
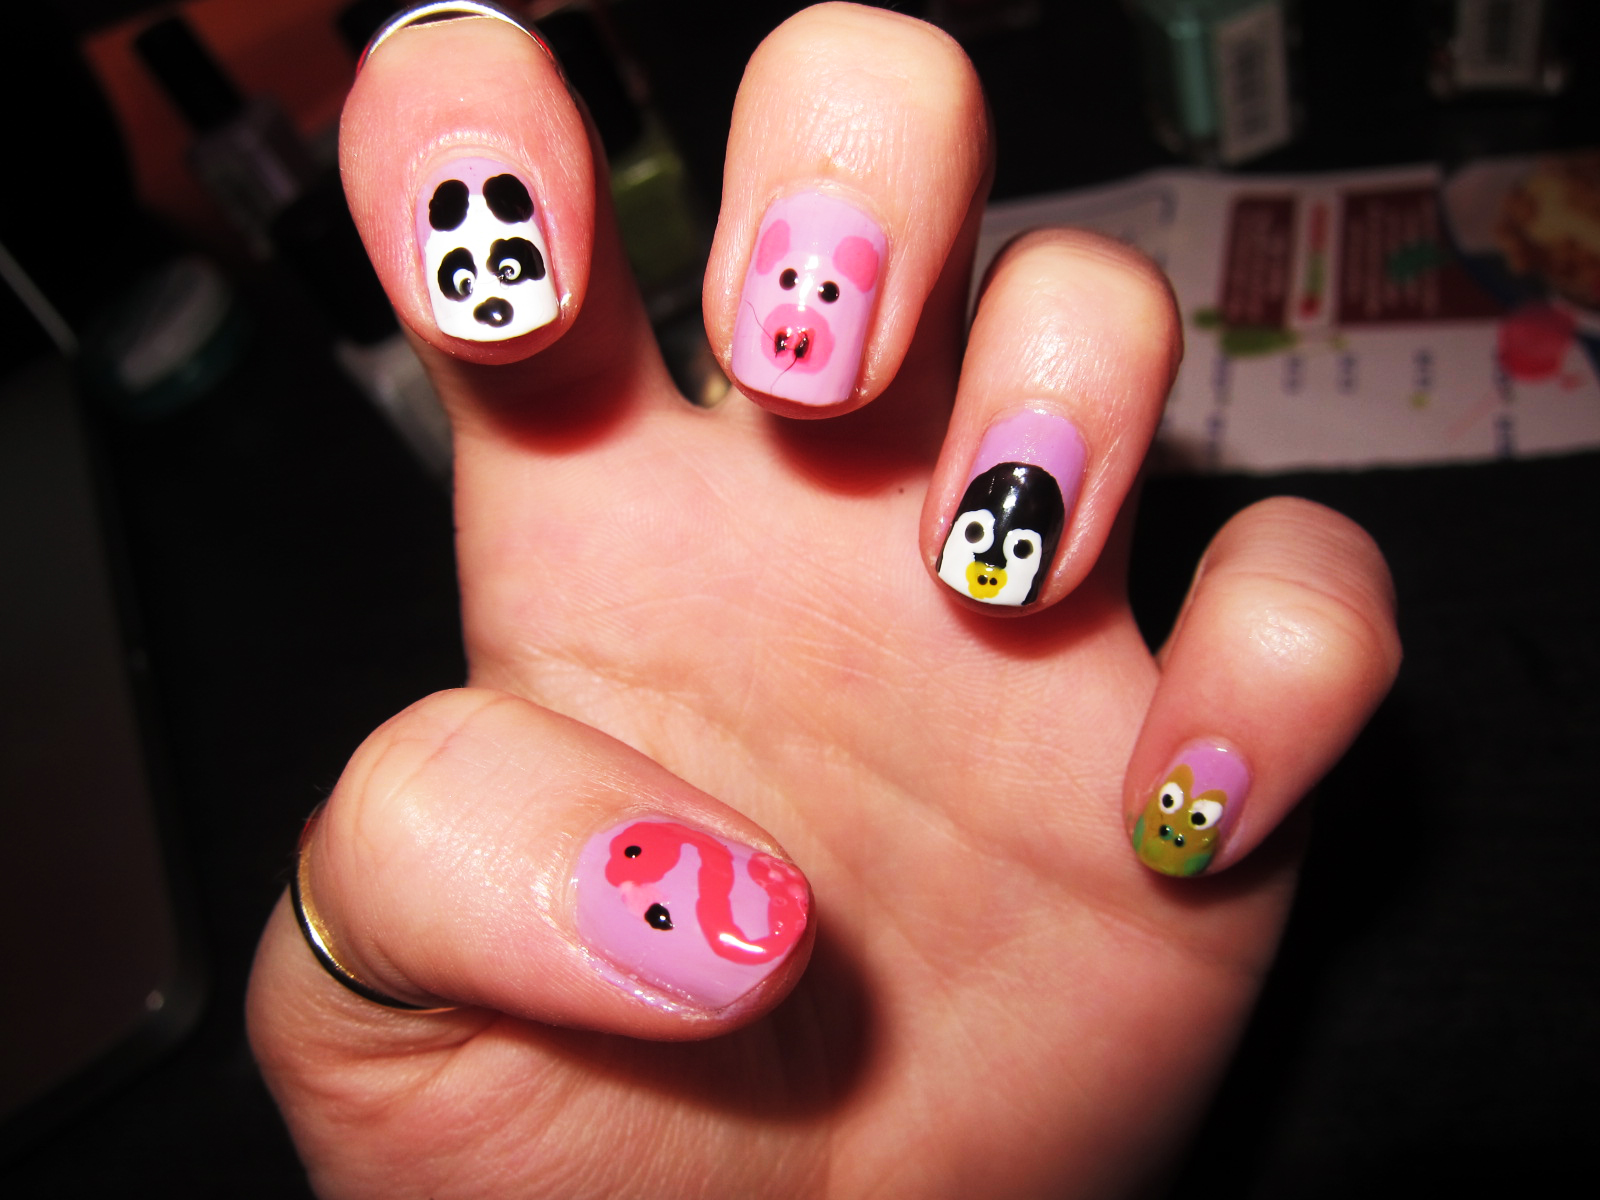
Here's the quick and easy tutorial for my Zoo nails. I saw these nails HERE and HERE and decided to give them a go myself.
Start by picking your base layer. I chose a light purple.

For Piggy you need to create a pink section over two thirds of your nail like so.

Then add a two ears and a snout with a slightly darker pink. (I used a dotting tool for this and all other details on the nails.)

Add two black eyes...

...and two nostrils. And you're done.

For Pandie do the same as before with Piggy's base but use a white.

Use a dotting tool to add two black ears, two black eyes and a little nose. Add a smaller dot of white for the eyes...

...and an even smaller dot for his pupils. And that's Pandie finished!

For Pingu, same again but with black...

Add his eyes and cheeks in white.

Dot in his eyes and beak, followed by two nostrils on top of that.

Flamingo needs a bit of artistry. Take a pink and draw this backwards S shape...

Add a lighter pink and a black for his beak and eye.

Frog uses a green as the base layer with two more bumps for eyes.

Add white and black for the eyes and nostrils. I added a slightly darker green for his cheeks. Once the base layer of green had dried I added some dots of the same green over in any spaces to create a bobbly skin effect.

And that's it. Finish with a top coat when all layers are dry!
Hope you like it!
x
Shall definately be trying this for next weeks NOTW, they look fab xx
ReplyDeleteOoh, I can't wait to see! They've lasted me really well actually, they're still on my nails now and I did them last week some time! x
Delete