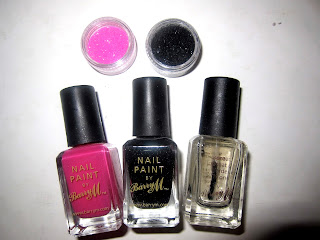
Glittery nails, here I come!
Firstly I painted my ring finger nails with Black Barry M Nail Paint, one layer. Whilst still wet I used a cotton bud to scoop the glitter out of the container and onto my nail.
(Make sure if you do this at home you have a spare scrap of paper folded in half and unfolded again. Work on top of the paper so any excess glitter that falls can be poured back into the container easily.)
I then repeated the same process with the pink glitter and Fuchsia Barry M Nail Paint. I worked on one or two nails at a time so that the nail varnish layer was still tacky enough to stick the glitter onto.
After all nails are glittered, wait around 10 minutes, or as long as possible for the base layer of varnish to dry and finish off with a thick top coat of clear varnish. I used the Barry M Top Coat.
Here are the nails without flash.
And with flash.
Super glittery!
I got my black glitter pot from ebay (I bought it as a set of 5 or 6 different colours) and they were super cheap. The trouble with the glitters from ebay though is that they're quite chunky and so your nails don't feel smooth even after a top coat. The pink glitter I used was a tester pot of MAC pigment. I forget the colour, but I bought it ages ago online somewhere. I'm sure you can find similar glitters all over the place. The reason I like this one is that the glitter is finely milled. It's more like a powder than chunks of glitter so creates a significantly smoother nail than the other glitters do - still not completely smooth though, but am I bothered? GLITTERY NAILS!


No comments:
Post a Comment